Create a 32bit DSN for VMware Update Manager
November 19, 2012 2 Comments
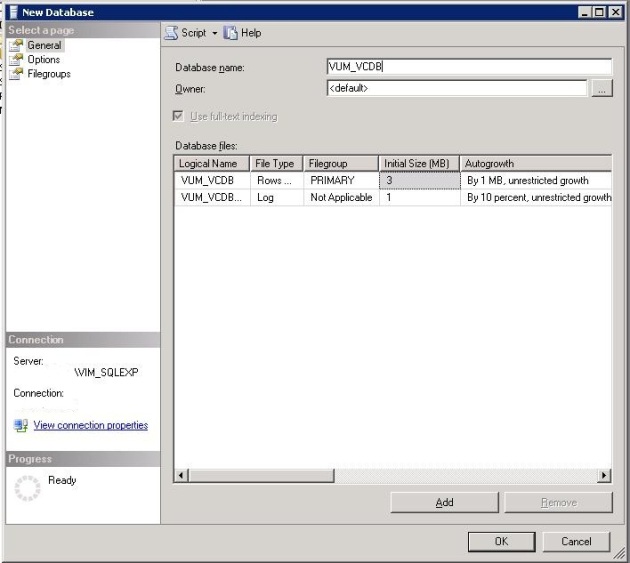
If you are installing a VMware Update Manager database onto an existing 64bit SQL server, you will need to add a 32bit DSN in order for the VMware Update Manager installer to find the database that you wish install to. Firstly create a new empty database for VMware Update Manager using SQL Management Studio:
Next locate and run odbcad32.exe which can be found c:\Windows\SysWow64, and add a new system DSN on the system tab. Then, choose the relevant driver for your DSN, in my case ‘SQL Server Native Client 10.0’, as shown below.
Assign a name to the DSN, and then specify the SQL instance that hosts the database:
Then specify the database that you are creating the DSN for under the ‘Change the default database to:’ section. Finally click next, and finish to complete creating the new DSN:
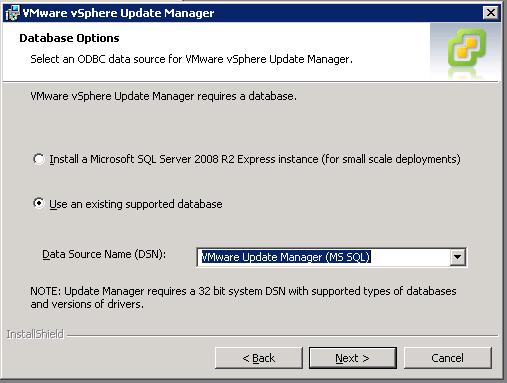
Now, when you run the VMware Update Manager installation you should be able to select the appropriate database in the ‘Use an existing supported database’ section and continue with your installation:


